
The stocking is on the bed, folded into a thick tube that looks like it could stand up on its own. You've got ten minutes before you need to leave, one foot on the floor, and a calf that's already starting to feel heavy. This is the moment to either give up or win the fight the wrong way, by hauling on the top band and trapping a fold behind the knee.
Getting the garment on is the first skill of compression therapy. It isn't the first decision. Before technique comes the safety gate: whether this pressure level suits these legs, whether the arteries can tolerate it, and what to do when the answer is no. What follows is the sequence I'd teach a patient, along with the stop signs and the adaptations that make it work for hands that aren't as strong as they used to be.
Table of Contents
- How to Put On Compression Stockings Step by Step
- Pick the Pressure Level That Fits Your Legs
- Stop-and-Check Signs Before You Push Through
- Donning Aids and Adaptations for Limited Mobility
- Adjusting the Routine for Lymphedema and Wounds
- Book a Professional Fitting When Stockings Keep Failing
How to Put On Compression Stockings Step by Step
Compression works best when you get ahead of gravity. Leg swelling sits at its lowest early in the day, which is why the Royal Australian College of General Practitioners guidance on compression recommends applying stockings in the morning, after any wound dressing is already in place. If you shower first or sleep in, lie flat and raise your legs for 20 to 30 minutes before you start, so the fluid that gathered overnight has somewhere to drain.
Three things belong on the checklist before the fabric touches your foot.
- The prescribed pressure level. Read the label on the box, not the label on the shelf. If you can't find the millimetres of mercury figure, that's a call, not a guess.
- A circulation check. If you have leg wounds, diabetes or known poor circulation, an ankle-brachial pressure index reading should already be on your record.
- The dressing, already applied and flat. Fabric dragged over a loose dressing edge moves it.
Now the sequence.
- Start with clean, dry skin. Dry between the toes and let the skin settle before you apply anything. Take off rings and watches. A prong or clasp catches a thread, and a pulled thread changes the pressure in that panel.
- Put on donning gloves. The RACGP guidance cites French national guidance recommending gloves to improve grip and reduce fabric damage. They also stop fingernails from puncturing the knit.
- Turn the stocking inside out to the heel. Push a hand in, grip the heel pocket, and roll the fabric down until only the foot portion remains right side out.
- Seat the foot and heel together. Slide the foot fully into the toe section, then line the heel pocket up with your own heel. If the pocket sits off centre, the ankle pressure lands in the wrong place.
- Ease the fabric up in short sections. Work from the ankle upward, gathering a few inches at a time and smoothing it into position rather than yanking the top band.
- Flatten wrinkles as you go. The same guidance is blunt about this: bunching, wrinkles or a rolled band create localized pressure, which defeats the graduated profile the garment was built for.
- Check the finish. No folds, no rolled top, no gathering at the ankle. If excess fabric has pooled at the ankle, push it back down and rework it from step five.
- Check the toes and skin. Numbness, tingling, unusual pain, pale or blue toes or increasing swelling are warning signs that need prompt clinical advice.
Here is the whole routine in one view, from timing through the final smoothing.
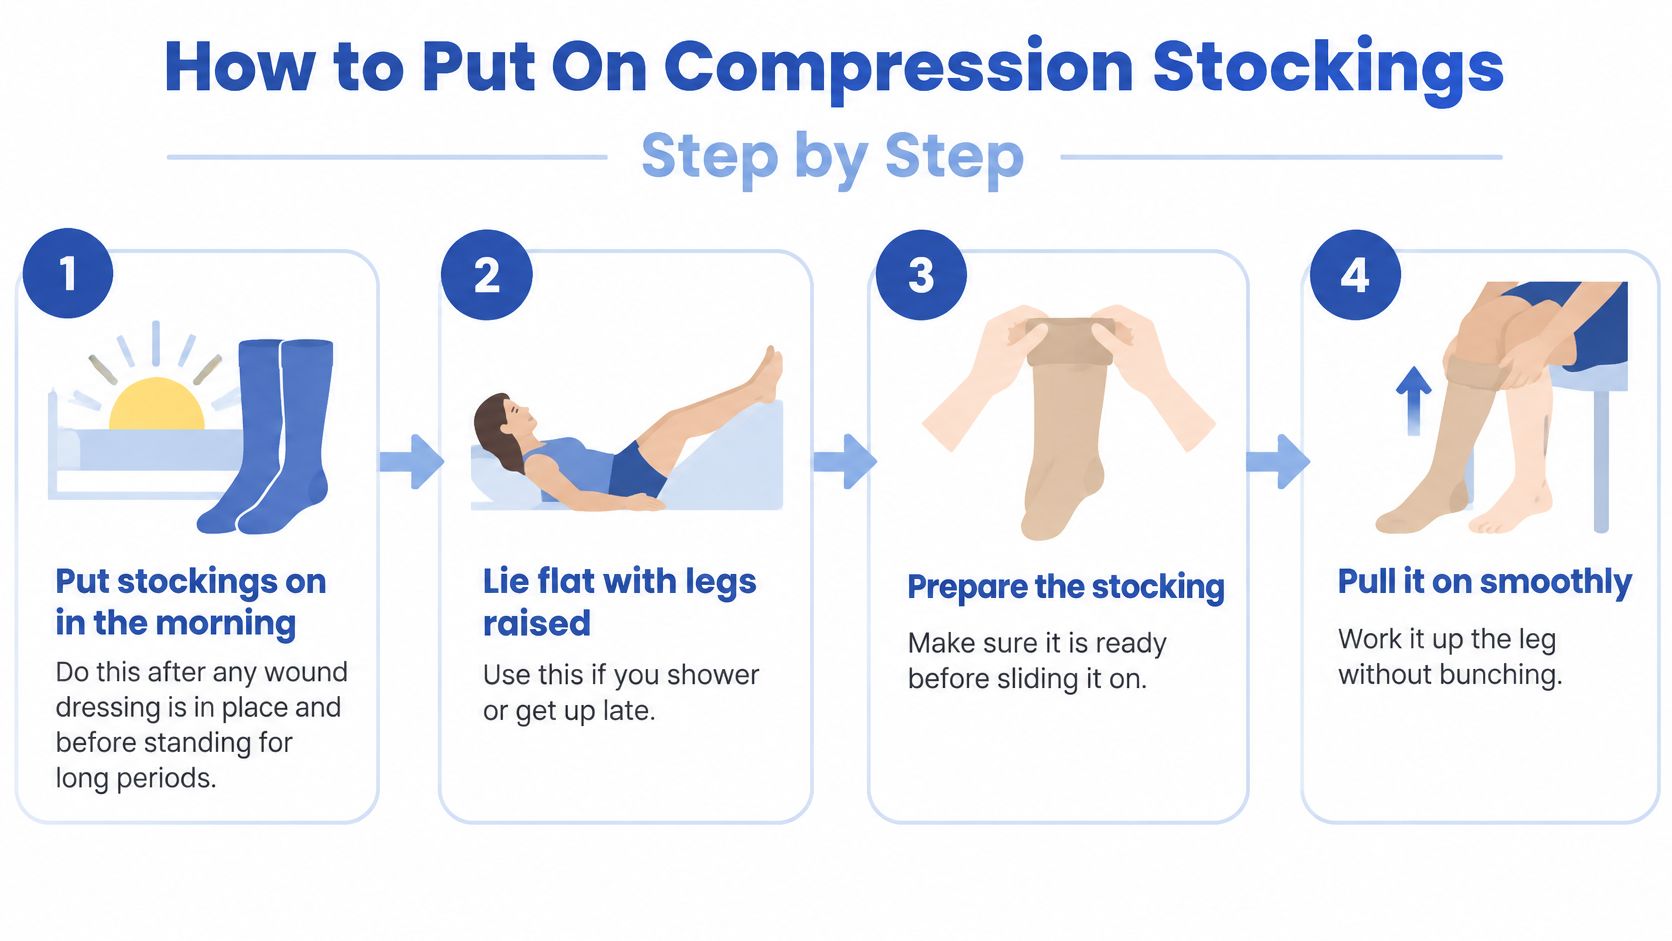
Repeat the same sequence on the other leg, which may need its own measurements and its own patience. Then note which step caused trouble. That note is diagnostic. A stocking that fights you at step four is usually a sizing or shape issue, while one that fights you at step seven is usually a hand strength issue, and the two need different fixes.
The move that ruins a fit: pulling upward on the top band. It feels faster, and it drives the fabric into a narrow ridge at the ankle where pressure is already highest.
Pick the Pressure Level That Fits Your Legs
The number on a compression stocking refers to pressure at the ankle. Compression is graduated, with the most pressure at the ankle and progressively less toward the knee. For venous leg ulcers, clinical guidance on compression therapy describes 20 to 30 mmHg as a minimum therapeutic range, with 30 to 40 mmHg often preferred when appropriate.
| Pressure at the ankle | Typical use | Who needs clinical input first |
|---|---|---|
| 20 mmHg or less | Mild graduated compression for mild symptoms | Anyone with a red-flag condition needs assessment first |
| 20–30 mmHg | Minimum therapeutic range commonly used for venous leg ulcers | Vascular assessment before use |
| 30–40 mmHg | Often preferred for venous leg ulcers when clinically appropriate | A clinician should set the level |
| 40 mmHg or more | Strong compression for suitable patients | Use only with clinical approval |
A tight feeling alone does not confirm a correct fit. Pressure depends on the stocking's compression level, ankle and calf measurements, leg shape and how the garment sits. Measure each leg separately, since the measurements may differ. For people with chronic venous insufficiency, how compression stockings fit into care depends on the individual's symptoms and clinical assessment.
Your clinician tells you the appropriate compression level and how long to wear the stockings. Follow that advice before buying a replacement pair or changing your routine. Unless your clinician recommends overnight wear, remove the stockings at night. Regular washing and replacing them as their elasticity wears down help maintain their fit and function.
When the level and fit are right, the stockings should stay in place through the day without repeated adjustment. They should also support the care plan for your symptoms, rather than being chosen by how tight they feel.
Stop-and-Check Signs Before You Push Through
A stocking can feel snug and still be unsafe if arterial blood flow is reduced. Before using compression, confirm the prescribed level and ask whether your ankle-brachial pressure index (ABPI), which compares blood pressure at the ankle with the arm, has been checked. The NHS compression bandages and hosiery formulary guideline gives these ABPI thresholds:
| ABPI result | What it indicates | Compression approach |
|---|---|---|
| Below 0.5 | Severe arterial disease | Do not apply compression stockings |
| 0.5 to 0.8 | Reduced arterial supply | Reduced compression with close monitoring |
| 0.8 to 1.3 | Adequate arterial supply | Full compression when clinical assessment supports it |
An ABPI result is one part of the decision, not a prescription by itself. A stocking can be correctly measured and fitted yet still be unsuitable when arterial supply is impaired. The wound, circulation and overall assessment all matter.
Pain that worsens rather than settles is a reason to stop, not something to push through as normal tightness. Follow the safety instructions given when you were fitted. If you have diabetes, a wound, or swelling that changes how the garment sits, ask your clinician whether the compression level and wear time remain appropriate.
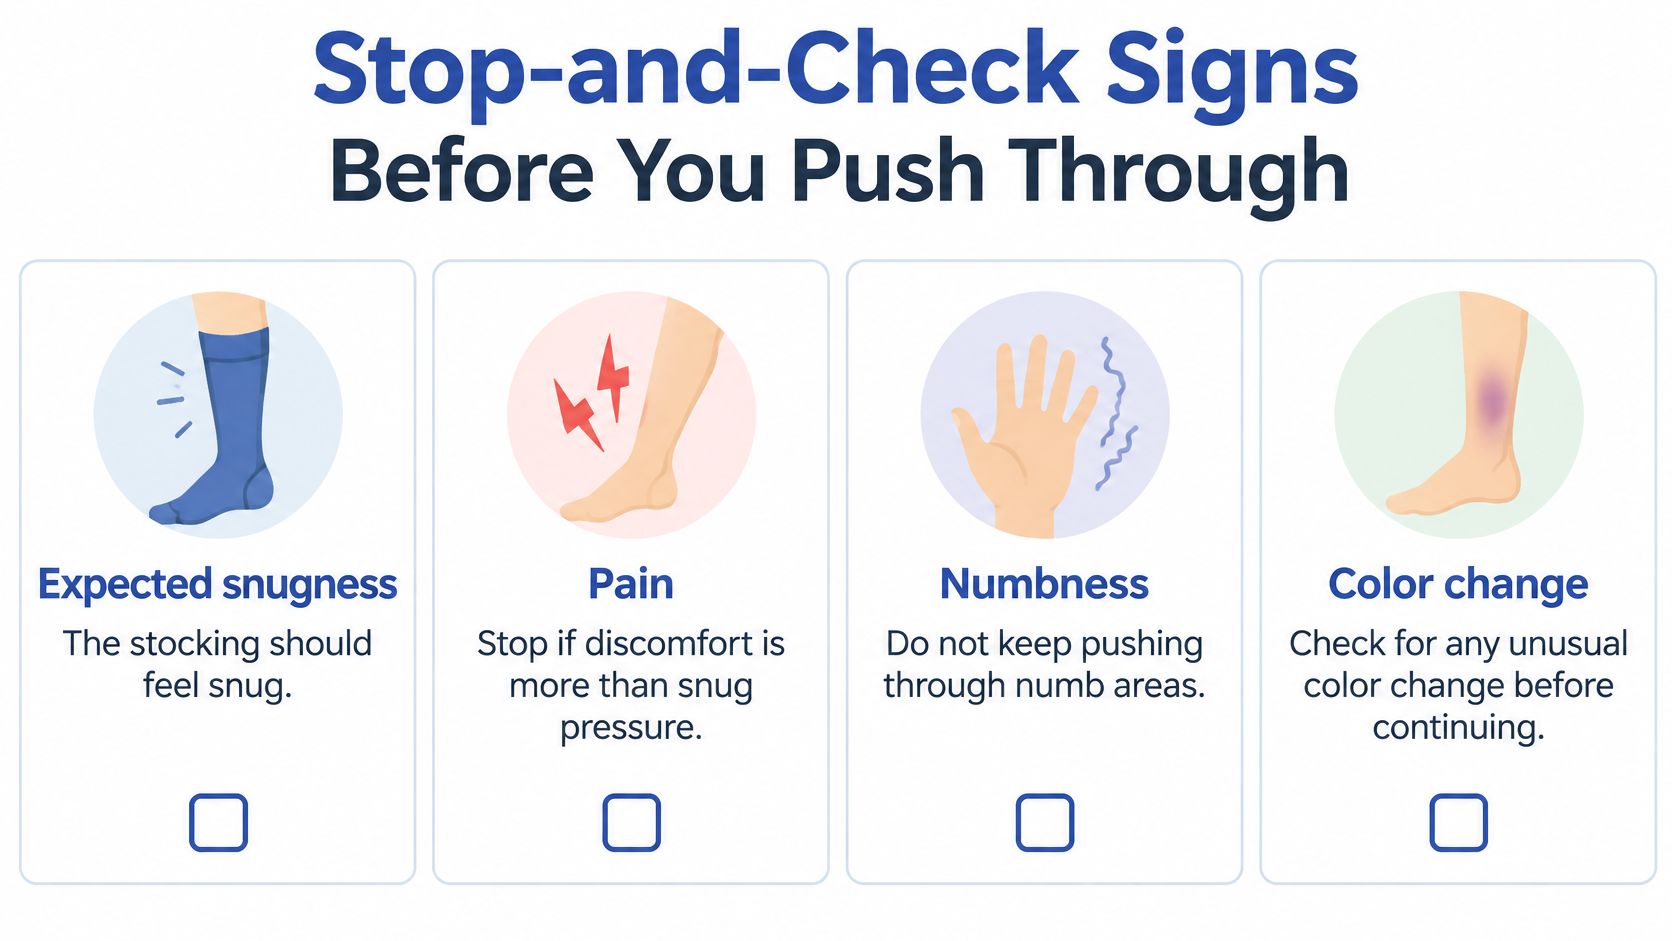
Before putting on your next pair, ask whether your ABPI is known and whether your wound or diabetes changes the plan. If the answer is unclear, pause and contact a clinician before applying compression. Guidance on when to see a vein specialist can help you decide when a fuller assessment is appropriate.
Donning Aids and Adaptations for Limited Mobility
A stocking that is hard to put on may call for a different aid or method, not more force. Before trying again, confirm with your prescriber that you have the right compression level and know how long to wear it. If you have not had an ankle-brachial pressure index (ABPI) check, ask whether one is needed before using compression.
A qualitative study indexed on PubMed found that physical, psychological and external factors can affect compression adherence. Age-related limitations and other health conditions can make donning difficult; heat and discomfort can also get in the way. The study reported that an adherence-support intervention improved stocking use and appeared potentially cost-effective, with an estimated incremental cost-effectiveness ratio of $3,379.36 per quality-adjusted life-year. In the CHAPS randomized trial, common reasons for stopping hosiery included heat, discomfort, damage, forgetting and difficulty putting it on. Follow-up visits, donning aids and alternative garments were used to support continued wear.
Choose an aid for the task that is difficult: grip, reaching, bending or managing the fabric.
| Aid | Best for | Watch for |
|---|---|---|
| Rubber or silicone gloves | Weak grip or slippery fabric | Loose gloves can snag fine fabric |
| Stocking donner frame | Reduced hand strength or arthritis | Check that it fits the stocking and practise using it |
| Long-handled dressing stick or hook | Limited hip or back bending | Move slowly to avoid bunching the fabric |
| Open-toe or closed-toe design | Difficulty fitting the toes or heel | Ask the prescriber which design suits your foot |
| Caregiver assistance | Severe mobility limits or full dependence | The caregiver should smooth the fabric in short sections |
For one-handed application, place the turned stocking on a clean, smooth surface, such as a bed with a cotton sheet. Hold the toe with your free hand and push your foot into it rather than trying to hold the stocking in the air.
If bending is difficult, sit in a firm chair and rest your foot on a low stool. This lets you work without folding forward at the hip. If your skin is fragile, gloves can help protect it from fingernails. Check the shin and ankle after taking the stocking off for any new marks or skin damage.
A caregiver can assist by smoothing the garment upward in short sections. Open-toe and closed-toe styles fit differently, so follow the prescriber's recommendation rather than choosing based on appearance alone. For help with reaching and dressing tasks, Cream Home Care's living aids guide covers aids for daily activities at home.
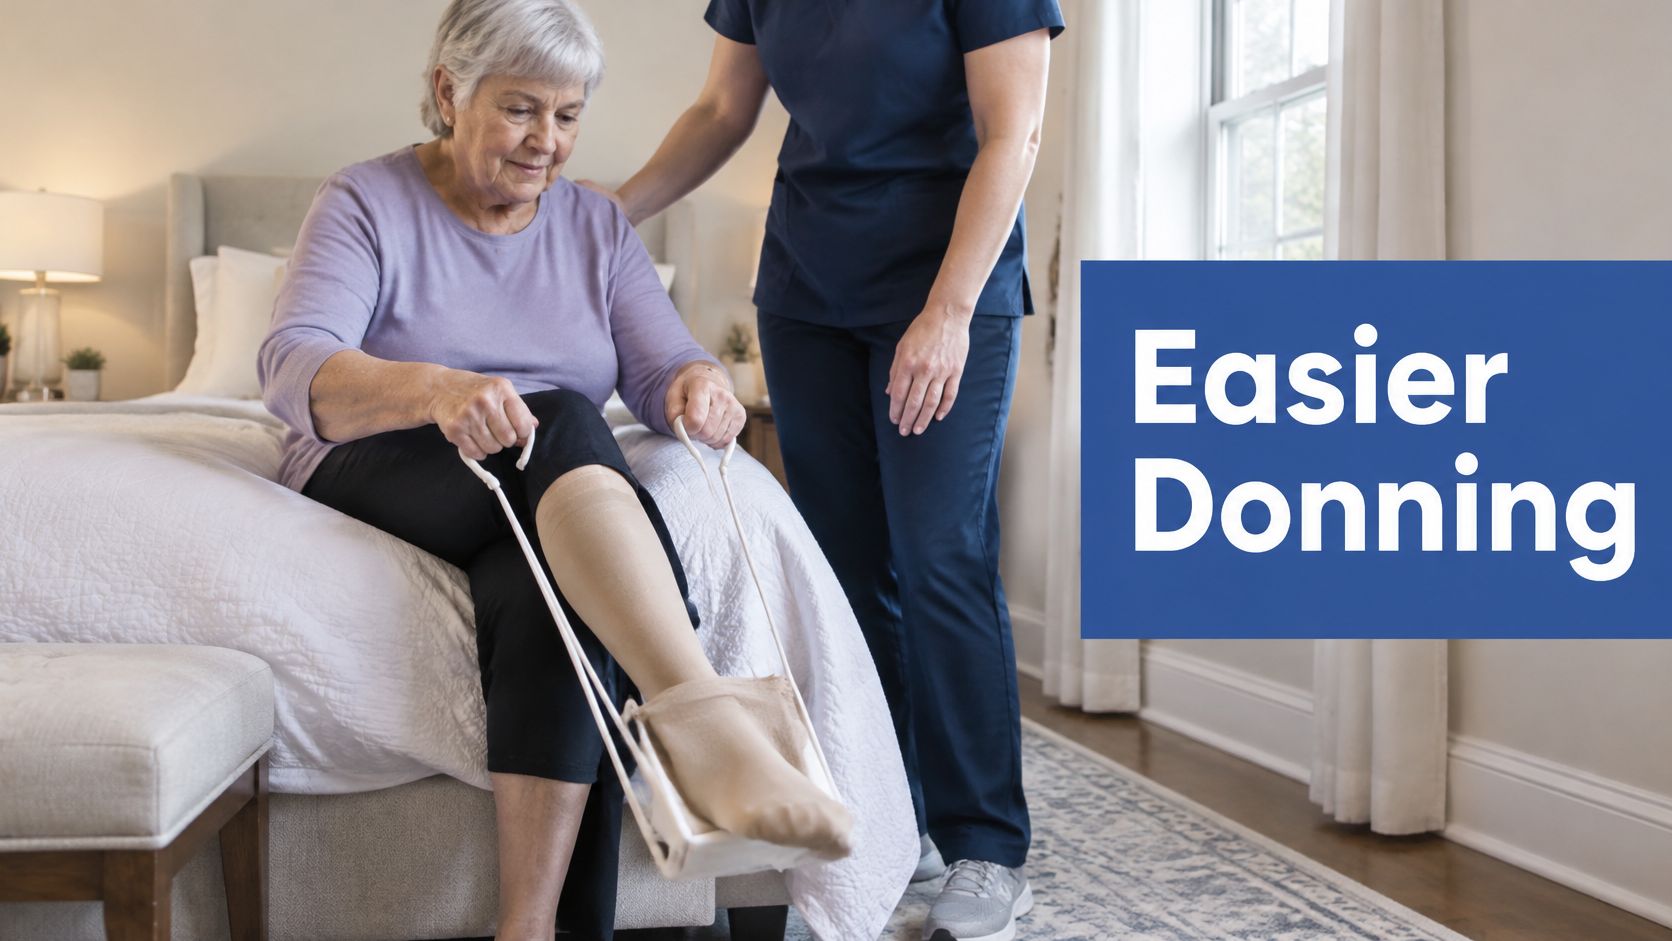
Stop if the stocking repeatedly will not go on, slides down, or no longer matches your measurements. These problems may mean the garment's size, design or compression level needs review. More pulling can bunch the fabric or irritate your skin; ask your prescriber or a fitting professional to reassess the fit.
Adjusting the Routine for Lymphedema and Wounds
Lymphedema changes the routine because the limb shape changes. A garment for a lymphedematous leg is usually fitted by a specialist and may sit inside a multi-layer bandage or garment system, so an over-the-counter stocking is not a substitute. Push the fabric gently and never roll it down over swollen skin, since a roll becomes a tourniquet. Work in the same short sections described above and stop the moment the fabric bunches.
For an open wound, the clinician sets the order of dressing and stocking, and the fabric never gets forced over the wound edges. If a dressing bulks the leg enough that the stocking drags or leaves a ridge, the size needs reviewing rather than stretching.
After a vein procedure, we may ask you to wear compression, avoid strenuous exercise for a period, and follow specific bathing or wound-care directions. Those instructions vary by procedure, so copy the exact schedule from your discharge sheet instead of applying a general rule you read somewhere.
Three things are worth writing down and taking to the next visit: whether your condition changes the garment you need, how long compression must be worn after a procedure, and any skin change, swelling pattern or dressing problem you noticed. Our page on lymphedema pain management covers what else helps alongside the garment.
Book a Professional Fitting When Stockings Keep Failing
Use a simple rule. Book a fitting if you can't get the stocking on after two or three careful attempts, if it slides, bunches or leaves a band, if the leg swells more after wearing it, or if the skin changes colour, breaks down or marks. Book a review as well if the prescribed compression isn't relieving your symptoms, because persistent venous symptoms or relief that doesn't come from compression, elevation and activity changes is a reason to look further, and a minimally invasive procedure may be considered at that point.
Bring four things to that appointment.
- The current stocking, with its box or label, so the level can be read.
- A note of the steps that defeat you, whether that's the heel, the calf or the top band.
- Recent measurements of both legs, or ask for fresh ones taken against the skin.
- A medicine list and dressing details, since both affect what's safe.
Ask for a fitting and a circulation check, which may include ABPI and ultrasound, before you spend money on another garment. Ask which compression level and wear schedule apply to you, and ask for the answer in writing, because the schedule is as much a part of the prescription as the garment. Ask that your measurements be recorded so the next purchase matches them.
The goal isn't a stocking that feels impressively tight. It's one that's correct for your legs, comfortable enough to wear all day, and reviewed when something changes.
Vein and Wound Institute treats the underlying venous disease that makes compression necessary, not just the garment that manages it. Our team handles evaluation with duplex ultrasound, minimally invasive vein procedures, and compression therapy coordinated with advanced wound care, so the stocking, the circulation check and the treatment plan come from the same place. If your stockings keep failing or your leg symptoms aren't settling, visit Vein and Wound Institute to schedule an evaluation at one of our Southern California locations.